How do you add ClickUp Forms to Motion.io?
Embedding ClickUp Forms in your Motion.io portal is a breeze. And once done, you can turn your client portal into a help desk, a ticket submission tool, or a contact form, all of which help you keep communications with your client on your terms.
*Note: You must be on the ClickUp Business Plan for forms to be accessible.
Adding ClickUp Forms to Motion.io
Step 1:
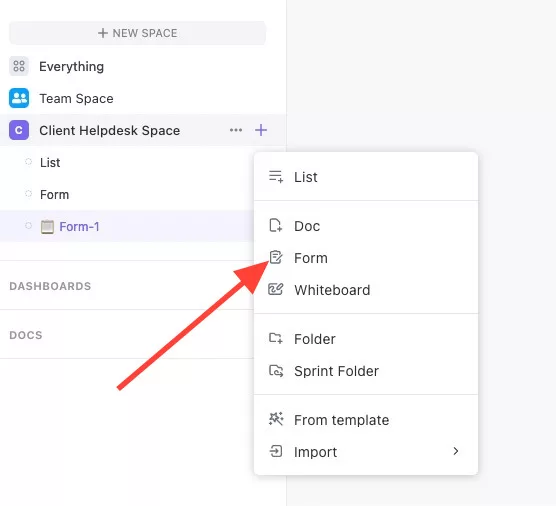
In your ClickUp account, click the + symbol next to the space you wish to create a form in. Then, click Form to create a new form.
Step 2:
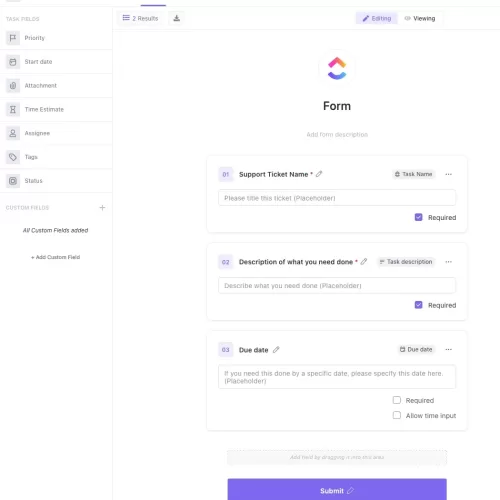
Adjust and customize your form to function how you would like it to.
Step 3:
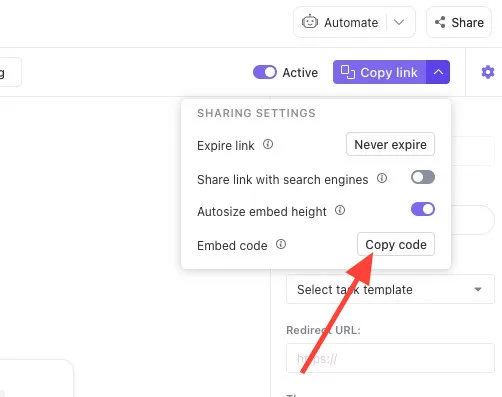
Once you’ve customized the form, click the ‘Copy link’ button in the top right. Then, click the Copy code button next to Embed code.
Step 4:
In your Motion.io account, select the portal you’d like to add a ClickUp form to and click ‘Pages’.
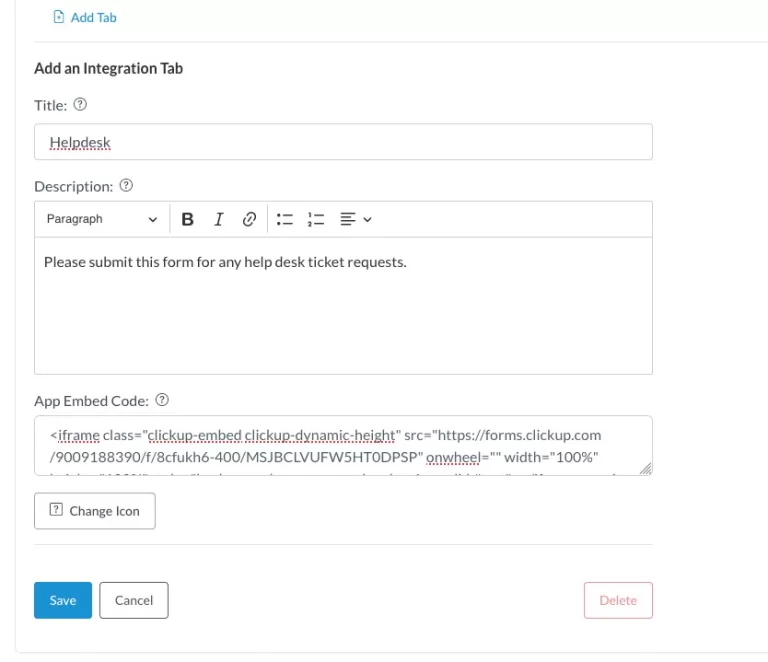
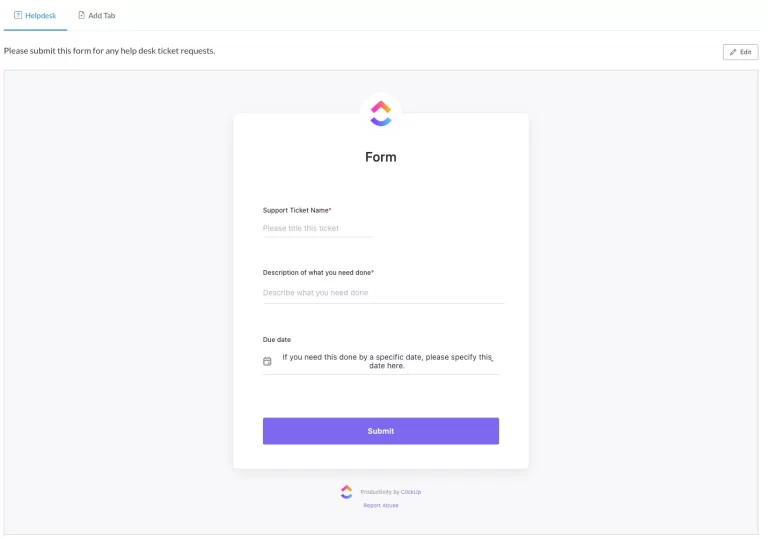
In the portal page editor, give your page a client-facing name in the “Title” section and enter any additional information for the client in the “Description” area. In this case, I named the tab ‘Helpdesk’ and added a description telling the client what this was for and what to do.
Finally, paste in the Embed Code from ClickUp into the App Embed Code section. Once finished, click Save to save the page.
Step 5:
Enjoy increased productivity with a ClickUp form embedded into your Motion.io client portal!
Final thoughts:
And that does it!
By following these steps, you have successfully added a ClickUp form to your client portal in Motion.io.
Please remember that if you need to change any settings on the form itself, you’ll need to do this via ClickUp directly. Any changes you make to that form should automatically update in Motion.io, too.
At last, a simple client portal
Assign tasks, share files, and embed your favorite apps in fully customizable & loginless portals both you and your clients will love.
