
Aug 6, 2025
3 Ways to Create a Client Portal in ClickUp (Step-by-Step Tutorial)
By
Sam Chlebowski
.avif)
Did you know ClickUp offers several ways to set up a client portal?
It all depends on how much access you want to give, how tech-savvy your clients are, and how you manage your projects internally.
Don’t get overwhelmed—this is actually good news. It means you don’t have to waste time building a so-so portal that kind of works. You can choose a setup that fits your workflow and gives clients the right level of visibility and involvement.
In this guide, we’ll walk you through exactly how to create a client portal in ClickUp using three proven methods.
What You’ll Need to Set Up a Client Portal in ClickUp
Before you get started with your client portal, it helps to have a few things ready. You don’t need everything fully fleshed out, but having these basics will make setup faster:
✅ A ClickUp Workspace
Your Workspace is your main account in ClickUp. It’s where all your projects, tasks, and clients will live.
If you haven’t set one up yet, you can create a free account and follow the quick prompts to name your Workspace and invite your team (optional). It only takes a minute to get started.
✅ A client project or list of deliverables
You’ll need something to share with your client, like a current project, onboarding checklist, timeline, or task list.
If you don’t have one set up yet, start with a simple list of tasks you plan to complete for them (you can always refine it later).
Even a rough outline is enough.
✅ A plan for what your client should see
Decide what kind of access makes sense:
- Do they need to see every task or just high-level progress?
- Should they be able to comment or view only?
- Are you sharing files, collecting info, or just giving updates?
This will help you choose the right method in the next section.
✅ Optional: branding or communication materials
If you want to go a step further, have a welcome message, onboarding doc, or FAQs ready to include in your portal. (Totally optional, but it makes things feel more polished.)
Which Method Should You Use to Create a Client Portal?
ClickUp gives you a few different ways to create a client portal, each with its own strengths depending on how you work with your clients.
Here’s a quick overview to help you decide which setup is right for you:
1. Shared Folder or List
Best for: Collaborative projects where the client is involved in day-to-day work.
Invite your client as a guest to a Folder or List so they can view tasks, leave comments, and upload files. It’s ideal when you need close communication and visibility.
2. ClickUp Dashboard
Best for: Clients who want a quick overview, not every task detail.
Create a Dashboard with widgets like task boards to give your client a visual summary of progress. This works well when they want to stay informed but don’t need to interact.
3. Public Doc with embedded views
Best for: One-off updates, simple deliverables, or clients who don’t need to log in.
Create a ClickUp Doc with embedded task views and a short welcome message. Then share it via a public link (no login required). This option is great for sharing updates or deliverables without giving full access to your workspace.
Option 1: How to Create a Client Portal Using a Shared Folder or List
This is the most hands-on method. You’ll create a space in ClickUp where your client can view tasks, check progress, leave comments, and upload files—all in real time.
Step 1: Create a Folder for your client
In your ClickUp Workspace, create a new Folder inside your “Client Projects” Space (or whatever Space you're using). This will hold all their work: Lists, tasks, Docs, and anything else you want to share.
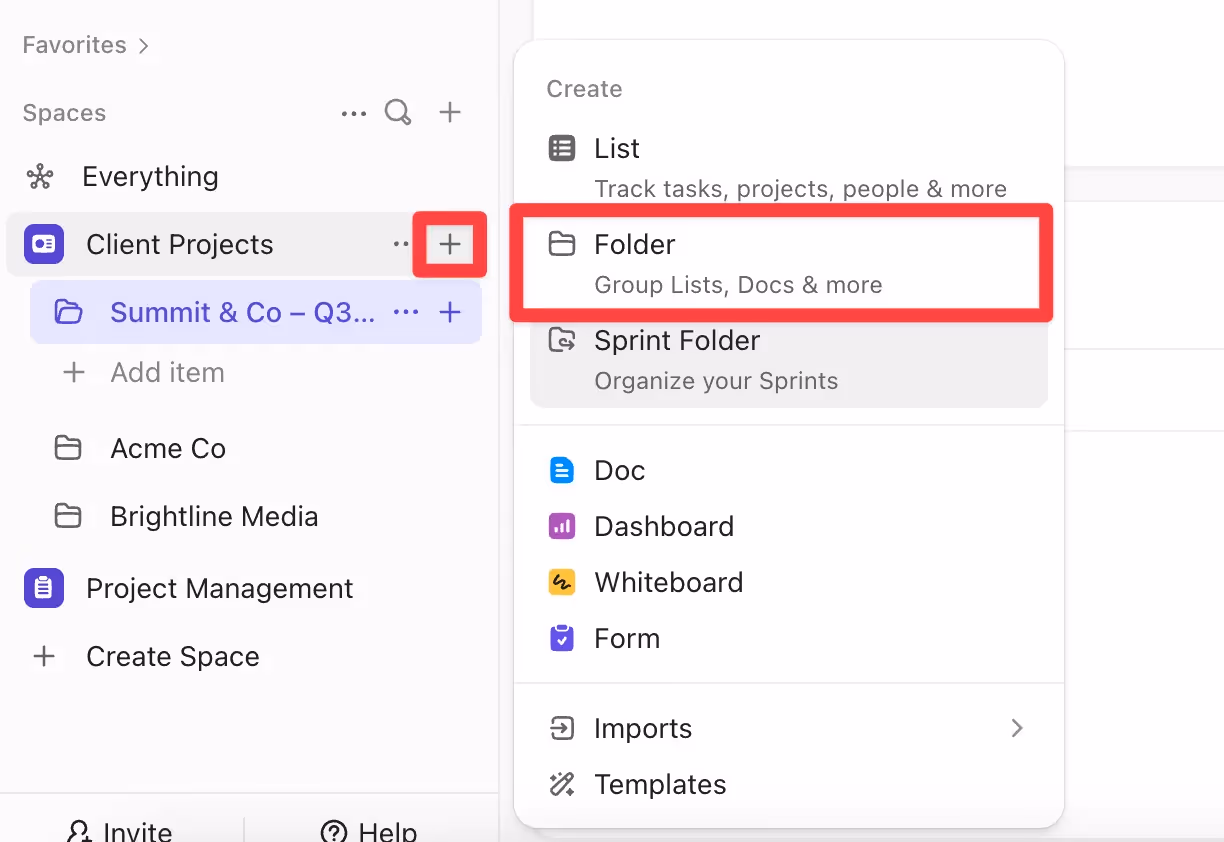
Simply hover over the Space name in the sidebar, then click the ➕ icon and select Folder from the menu.
If you run multiple projects per client, consider creating one Folder per client and one List per project. That way, your portal scales with your relationship.
Step 2: Add a List for the project or deliverable
Inside the Folder, create a List for the specific project or set of deliverables you're working on. This is where the actual tasks will live.
To do this, click the ➕ icon next to the folder name, then choose List from the dropdown.

Examples of List names:
- Website Redesign
- Creative Deliverables
- Onboarding Tasks
💡Tip: If your work involves multiple teams (e.g., design, development, strategy), consider creating separate Lists for each. Just make sure to only invite the client to the ones they need to see.
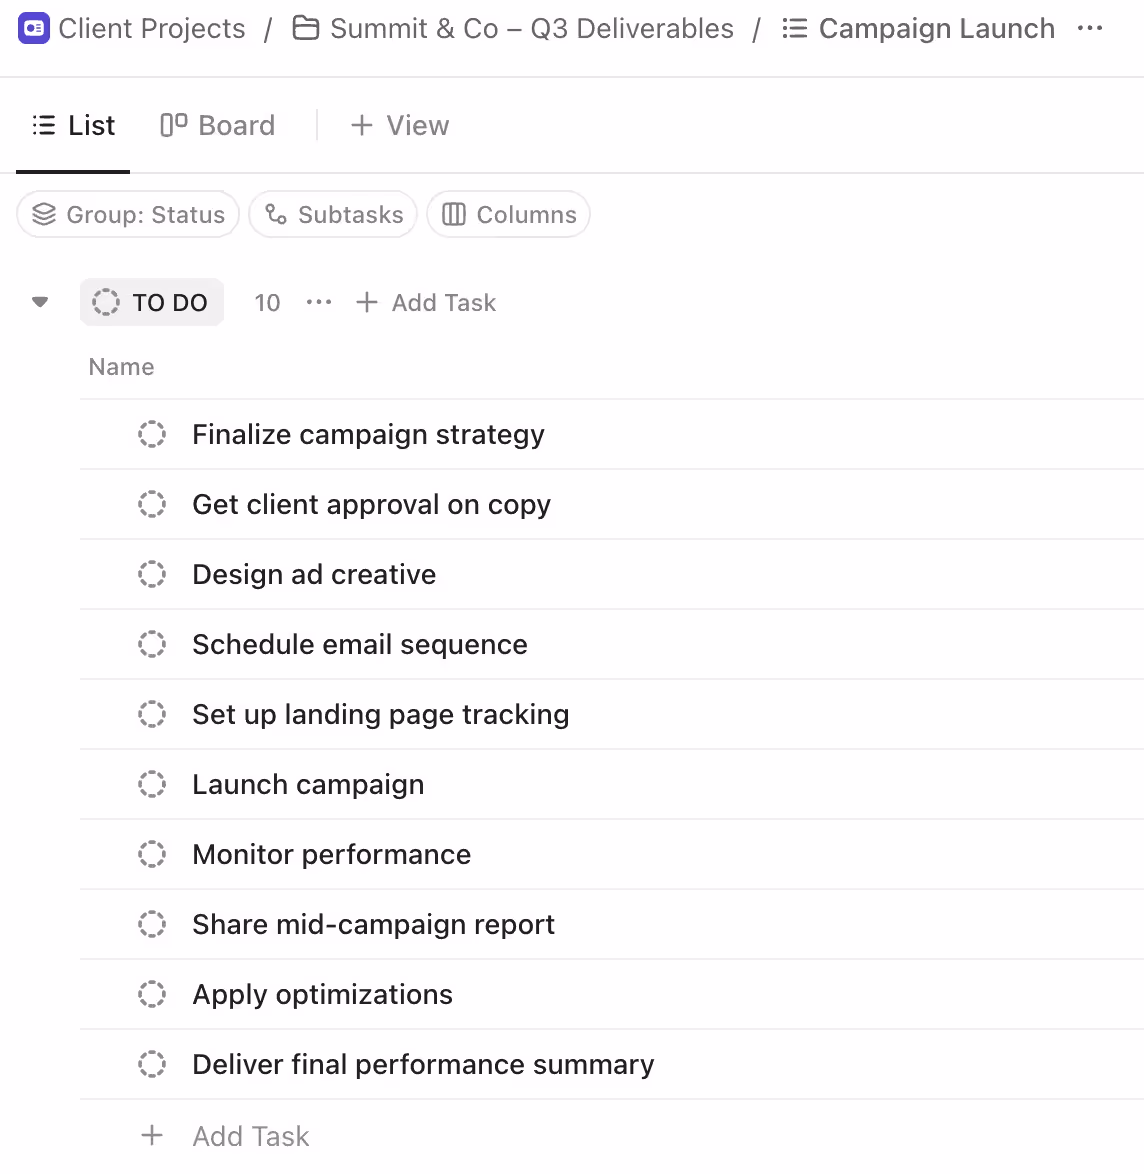
Step 3: Create clear, client-friendly tasks
Now start adding tasks to your List; these represent the actual work you’ll deliver.
The task names should be short, action-oriented, and easy for your client to understand.
You can also customize each task by:
- Adding a due date
- Assigning it to a team member
- Marking priority
- Attaching files or Docs
- Leaving comments or instructions
💡 Tip: If you have internal subtasks or process steps that don’t need client input, hide them in a private view or create a separate internal-only list.
Editing task status
Statuses in ClickUp help you show where each task is in your process, like whether it’s just starting, in progress, waiting on client input, or fully complete.
By default, ClickUp includes basic statuses like “To do,” but you can (and should) customize them to match how you actually work.
To edit or add statuses:
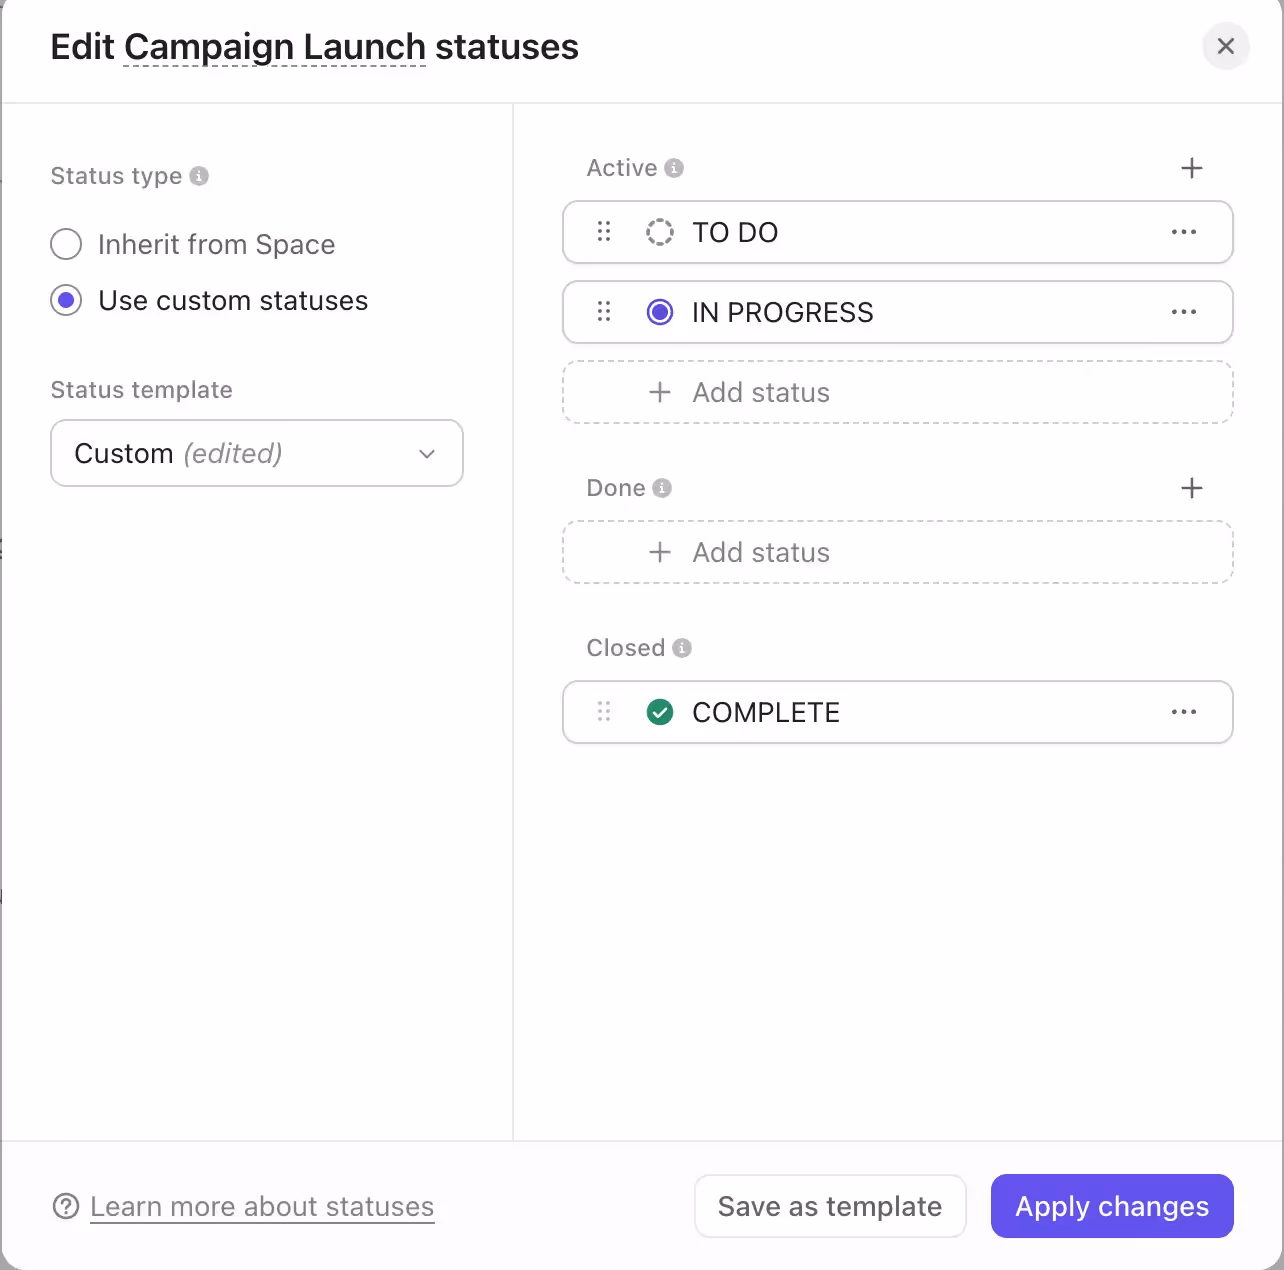
Click the ⋯ (ellipsis) that appears to the right of your current status ("TO DO" by default). Then select Edit statuses.

A panel will appear where you can:
- Rename existing statuses
- Add new ones (like “Needs Feedback” or “Waiting on Client”)
- Reorder or color-code them to fit your flow
Step 4: Clean up the view before you share
Before you send that invite, pause and put yourself in the client’s shoes. What do they really need to see?
To keep their experience simple:
- Hide any internal views or dashboards (feature only available on paid plans)
- Pin the most relevant view
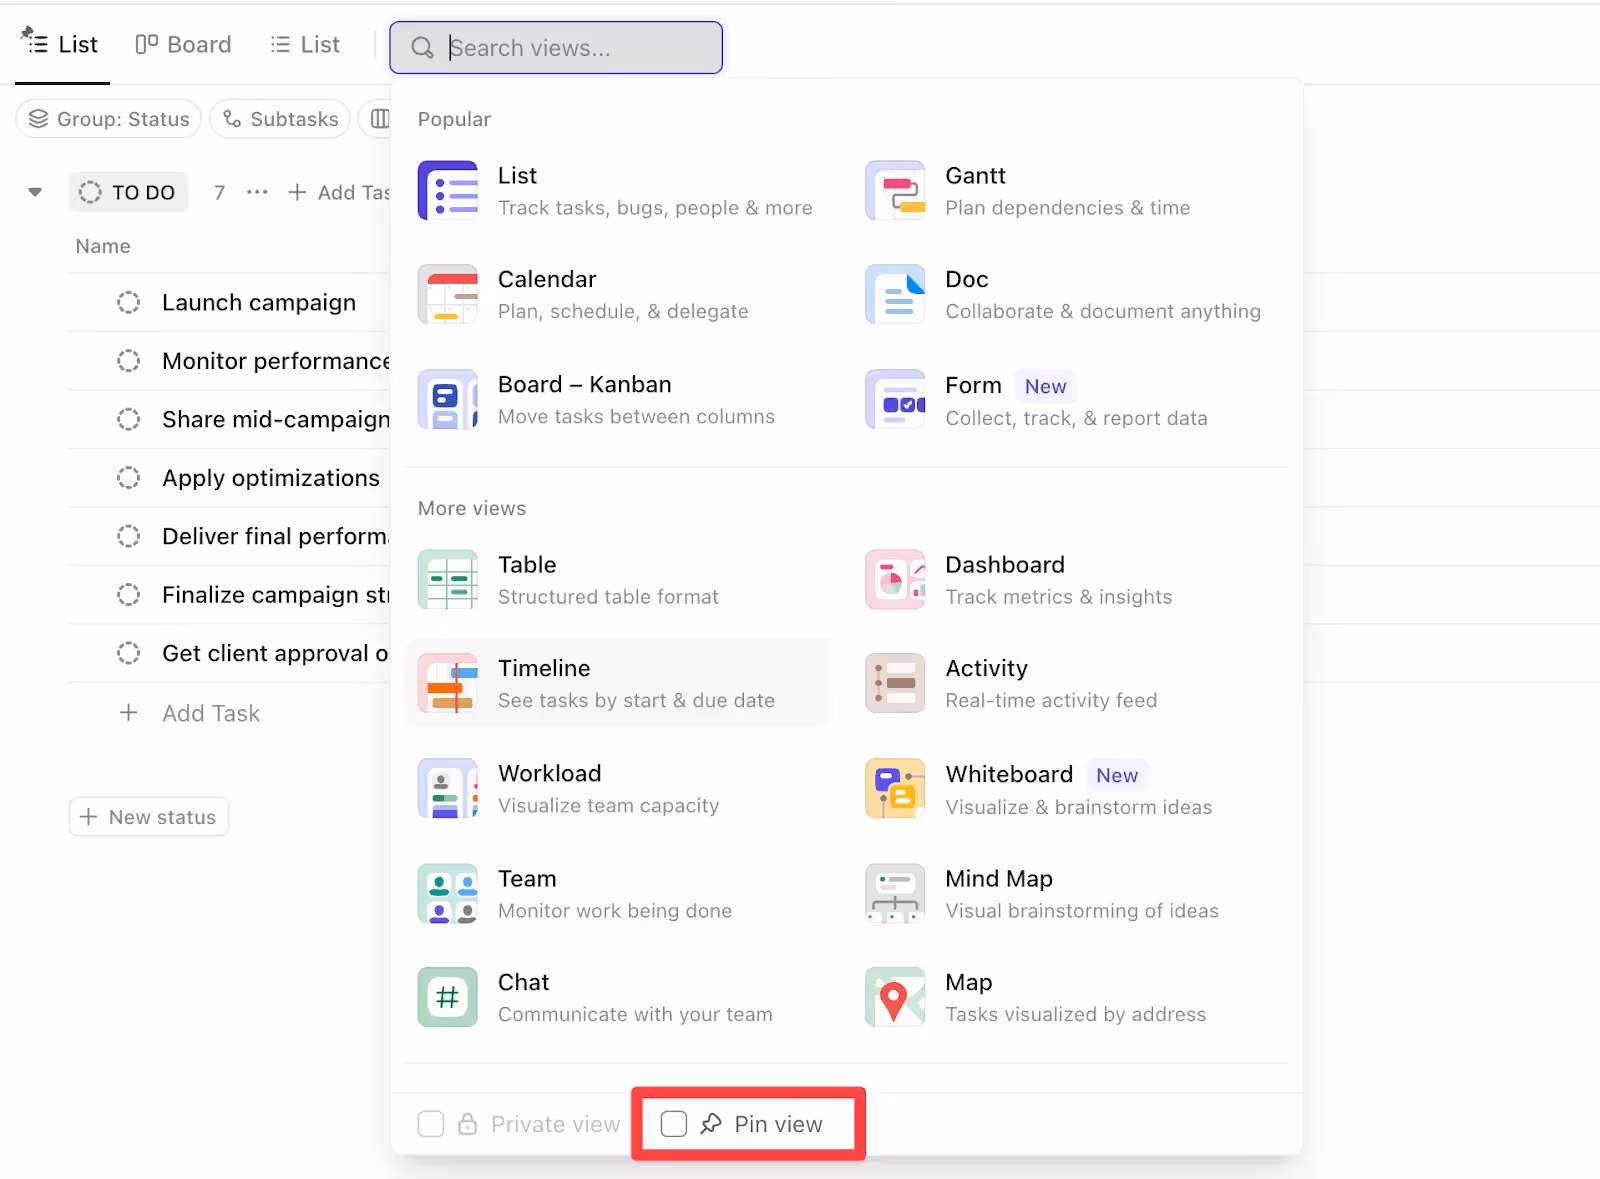
- Rename confusing list views
- Remove filters or grouping that only make sense internally
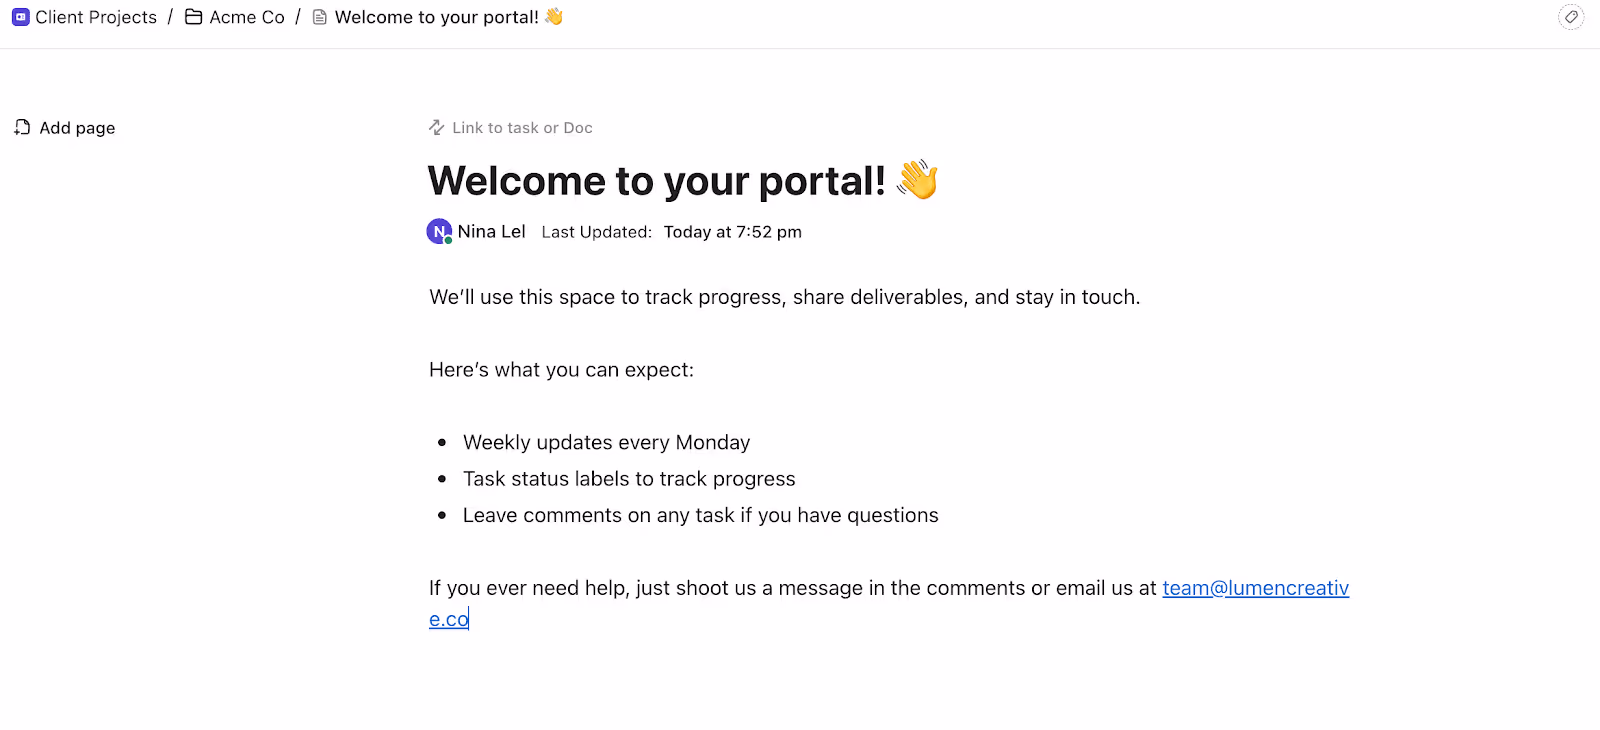
You can also add a ClickUp Doc with a welcome message or FAQ. A short note like “Here’s how to use this space” can save you from answering the same questions repeatedly.
Step 5: Invite your client as a guest (carefully)
Now that your folder and tasks are set up, it’s time to give your client access.
Click the “Share” button in the top right corner of your Folder or List, and then invite them using their email address.
ClickUp defaults to "Member", which gives people access to everything in your Workspace. That’s fine for team members, but not for clients. You’ll need to manually change their role to "Guest" before sending the invite.
🔒 Don’t invite clients at the Space level unless you want them to see every folder and list within it.
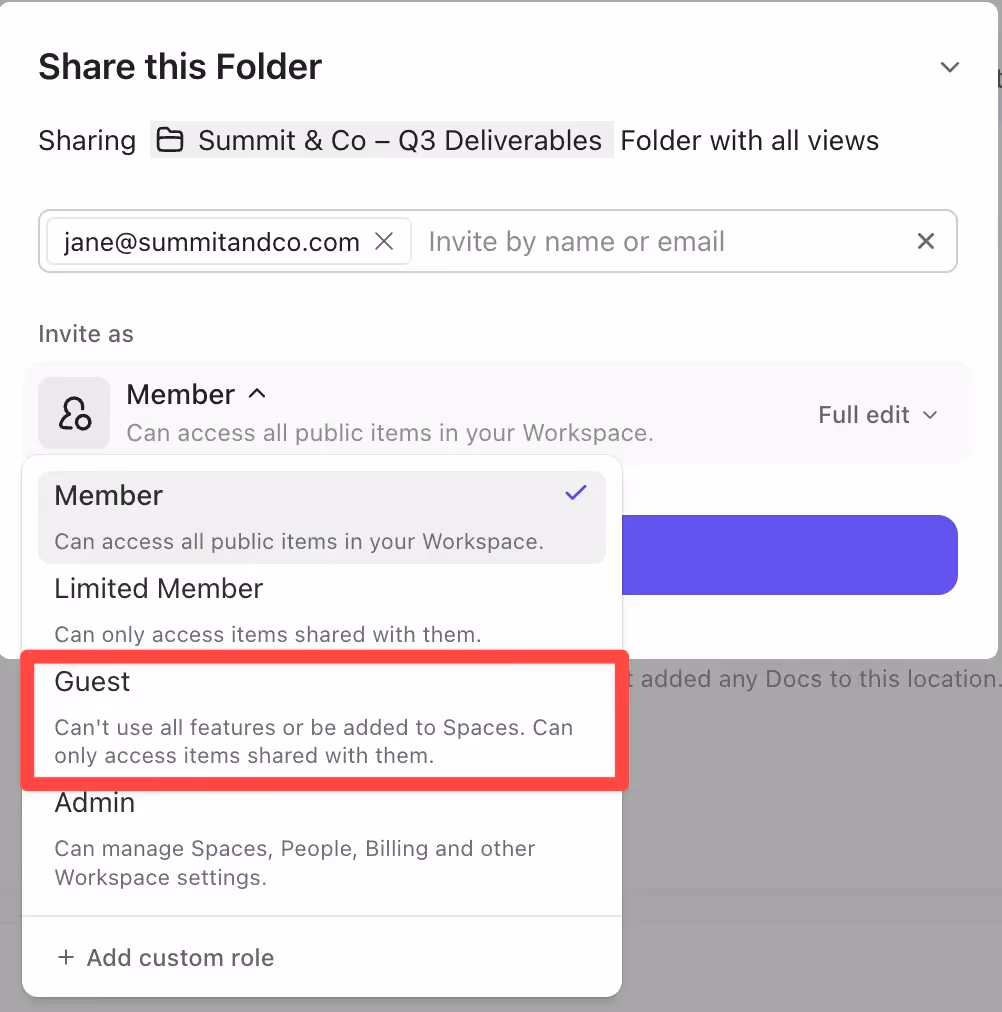
Then choose the right permissions for your guest:

- View Only – perfect for clients who just want updates
- Comment – allows for feedback, approvals, and questions
- Edit – only use if the client is highly involved (and tech-savvy)
💡 Tip: ClickUp doesn’t have a built-in “preview” mode, so it’s a good idea to test guest access by inviting yourself using a different email.
Step 6: Save it as a template (optional but worth it)
If you work with multiple clients, you’ll thank yourself later for templating this setup.
Click the three-dot menu on your Folder, and then select Templates > Save as Template.
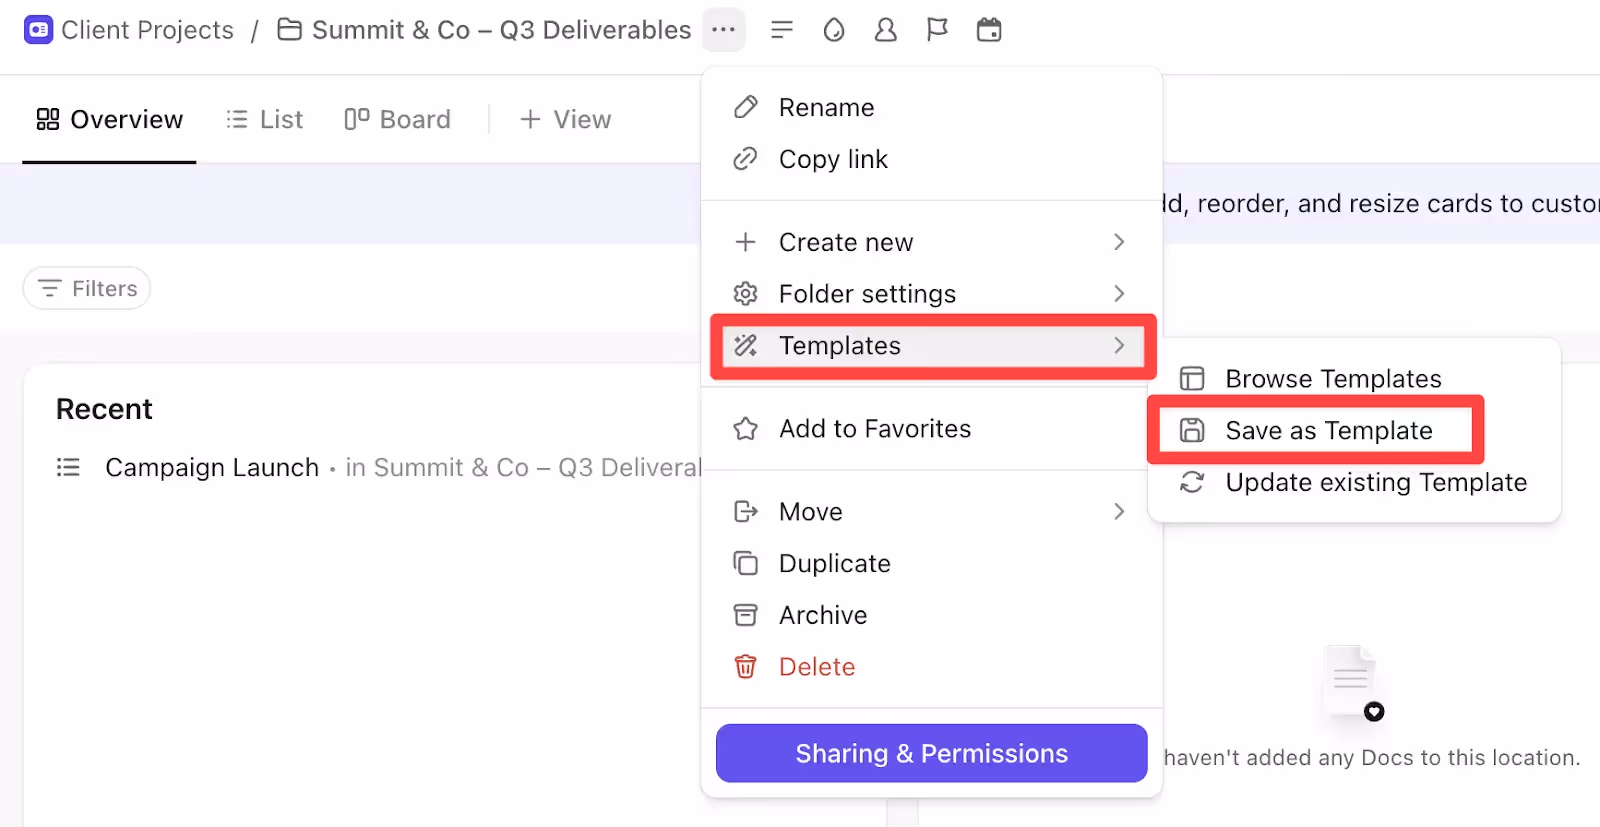
You can choose whether to include tasks, assignees, due dates, Docs, and more.
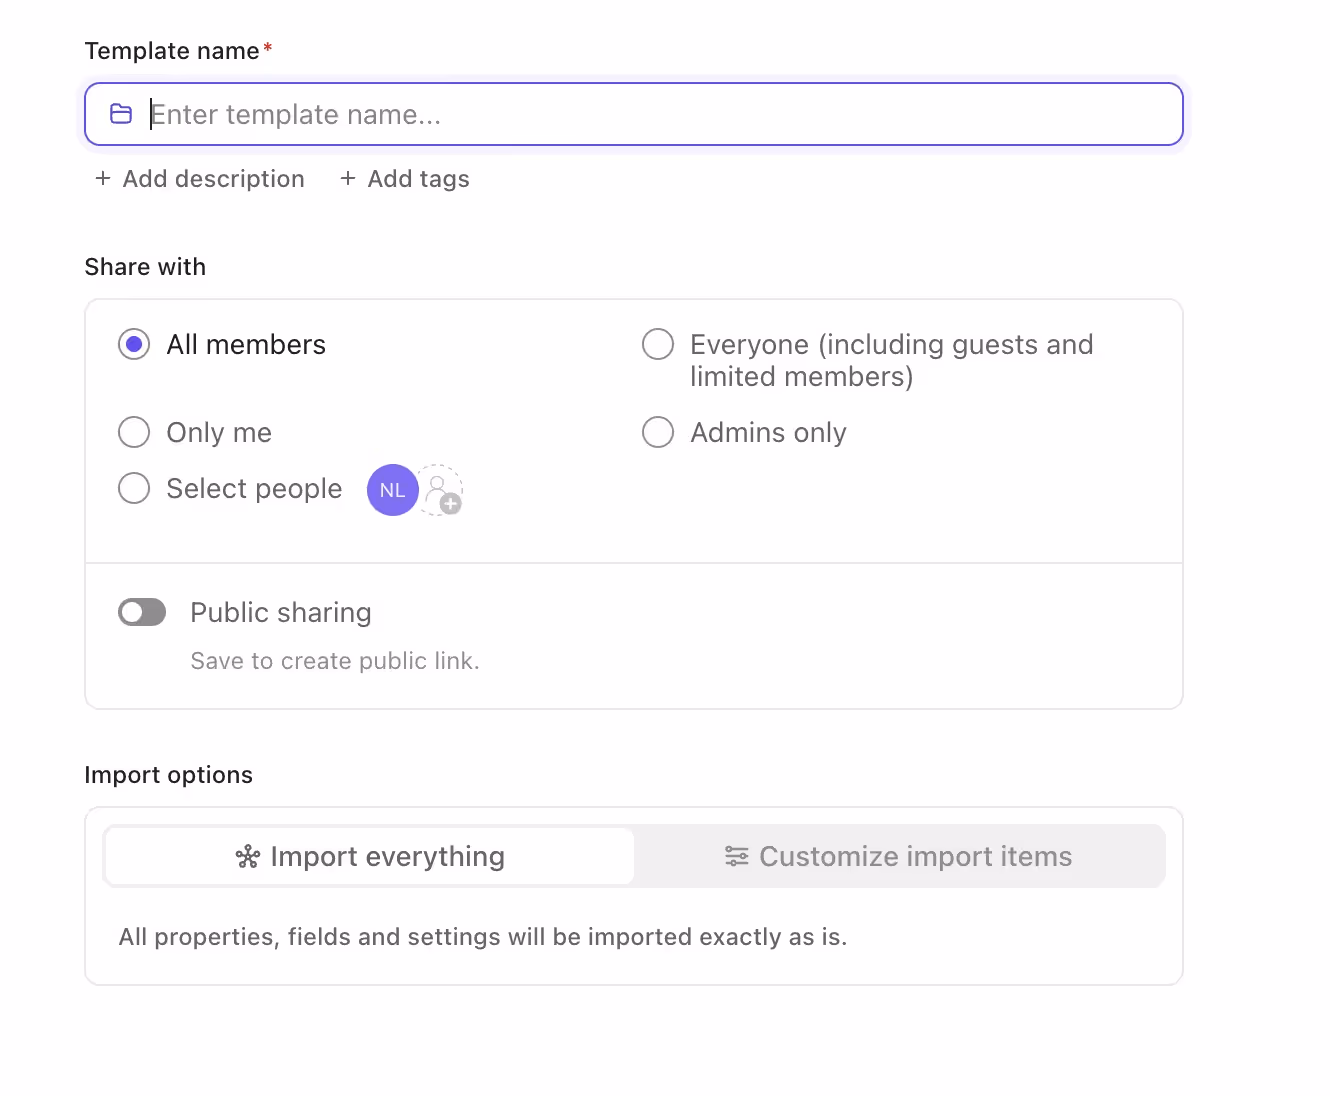
💡Tip: Uncheck assignees and dates unless you want them to carry over — they often don’t apply to new projects.
Option 2: How to Create a Client Portal Using a ClickUp Dashboard
A ClickUp Dashboard gives your client a simplified overview of their project—no tasks to manage, just visual updates.
You’ll choose what to show using widgets like task lists, timelines, charts, and docs.
Step 1: Create a new Dashboard
In your Workspace, click the + (plus) icon next to Dashboards in the left sidebar.
You’ll land on a screen that looks like this:

From here, you can:
- Pick a Simple Dashboard if you just want basic project visibility
- Choose Client Portal (available on Business plans) for a ready-made layout
- Or select Start from scratch for full control
For this walkthrough, we’ll show you what happens when you start from scratch, so you can see how to add each widget step-by-step.
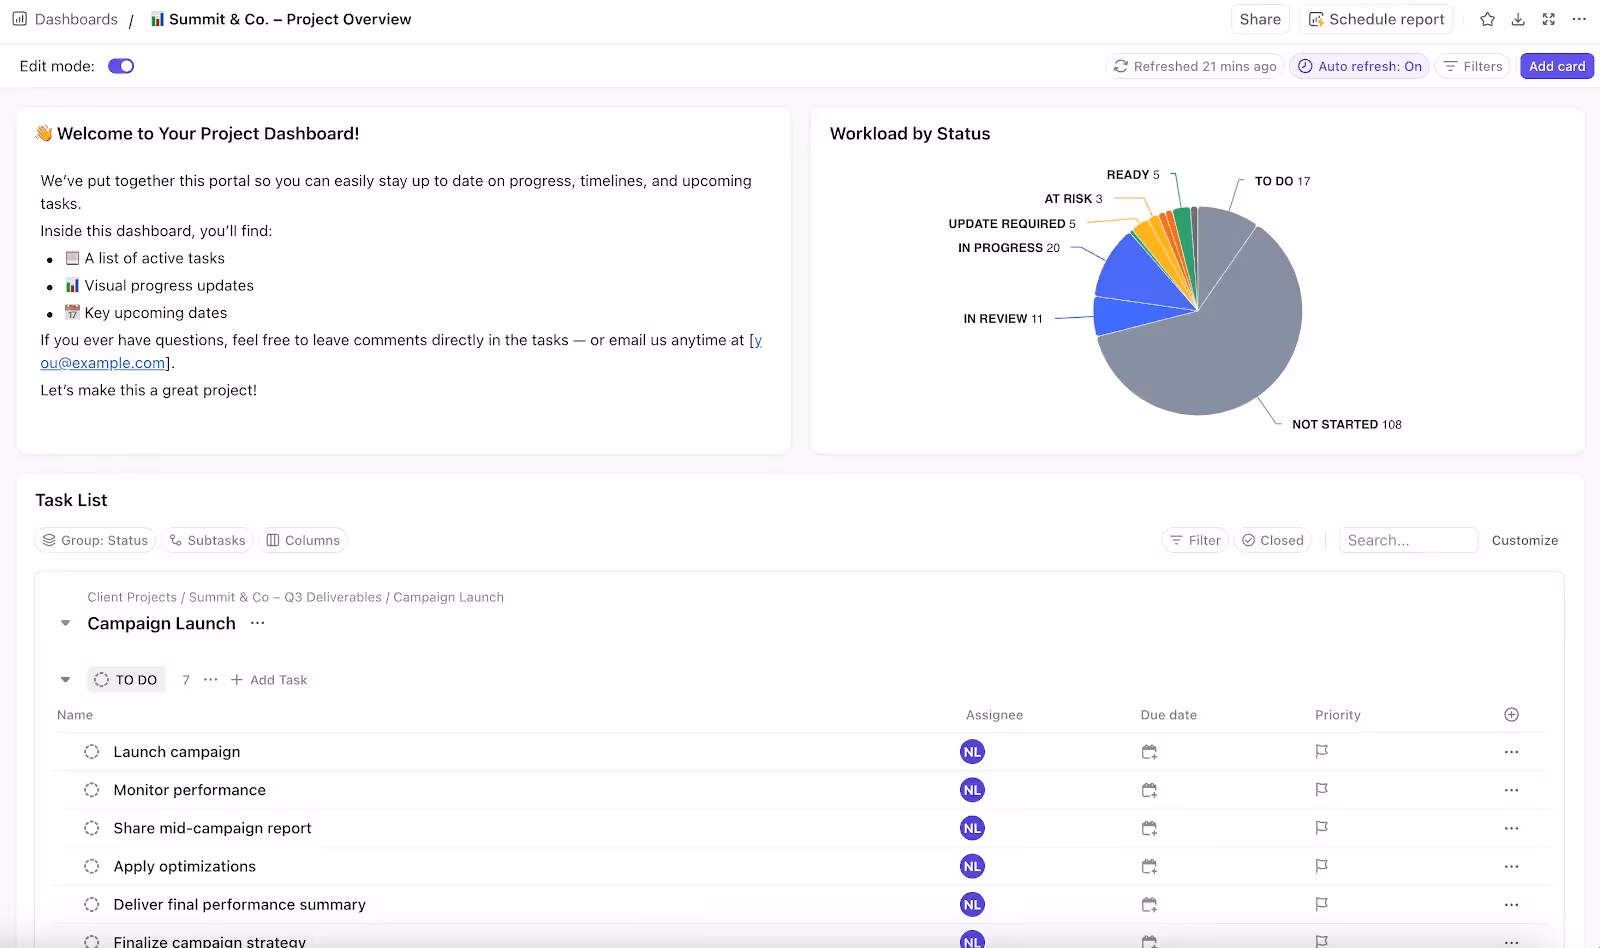
Step 2: Add widgets based on what your client needs
Once your Dashboard is created, you’ll see a screen like this where you can add widgets (called “cards” in ClickUp).
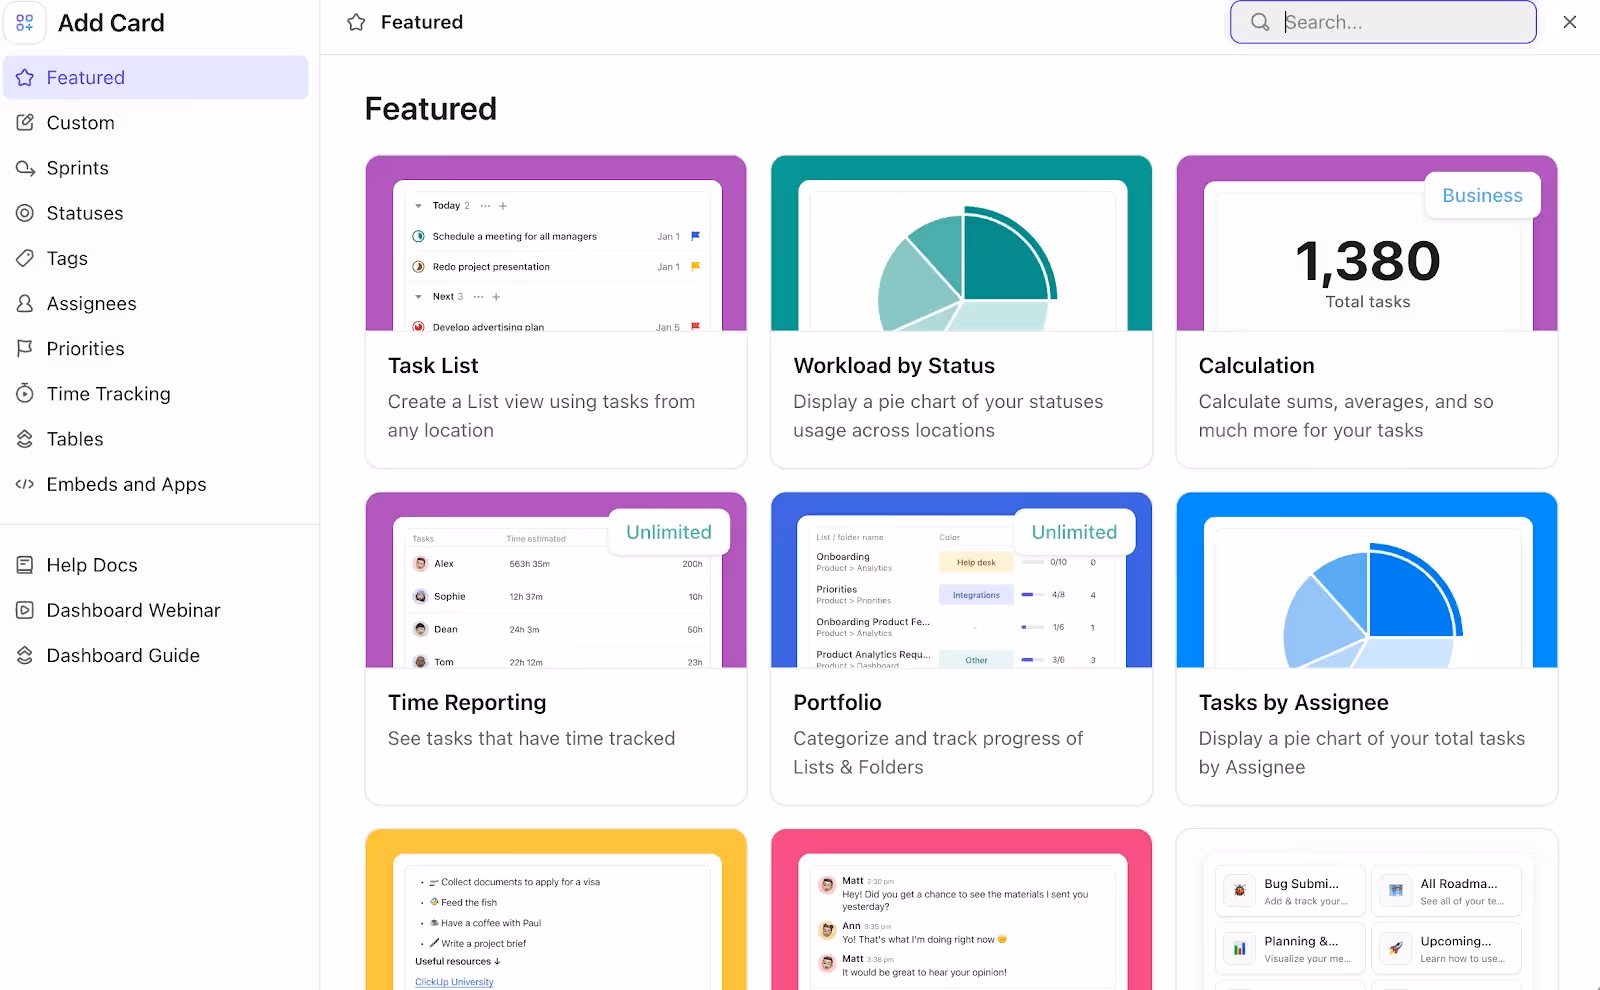
These are the building blocks of your client portal—they control what your client can see and track.
Some great client-friendly widgets to start with:
- Task List: Show project tasks pulled from specific folders, lists, or filtered views
- Workload by Status: Visual pie chart showing how many tasks are To Do, In Progress, or Complete
- Calendar or Timeline (under “Custom” tab): Helps your client track deadlines at a glance
- Tasks by Assignee: Use this if you want to show who’s doing what
- Doc Embed (under “Embeds and Apps”): Share a welcome message, instructions, or FAQ inside the Dashboard
💡 Tip: Start small; 2-4 widgets are enough. You can always expand later once the client gets used to it.
Step 3: Add a personal touch (optional)
Want to make your Dashboard feel more client-friendly? Try these quick touches:
- Add an emoji in the title
- Include a note with a welcome message
- Use consistent branding colors in chart widgets
Step 4: Customize filters to keep it clean
Once your widgets are in place, you can adjust the filters to control what shows up.
Click the “Filters” button at the top of your Dashboard to narrow down the data shown across all widgets. You can filter by:
- Status (e.g., show only “In Progress” and “Complete”)
- Assignee (great if you only want client-visible tasks)
- Tags (like “Client-facing”)
- Due date (only show active or upcoming work)
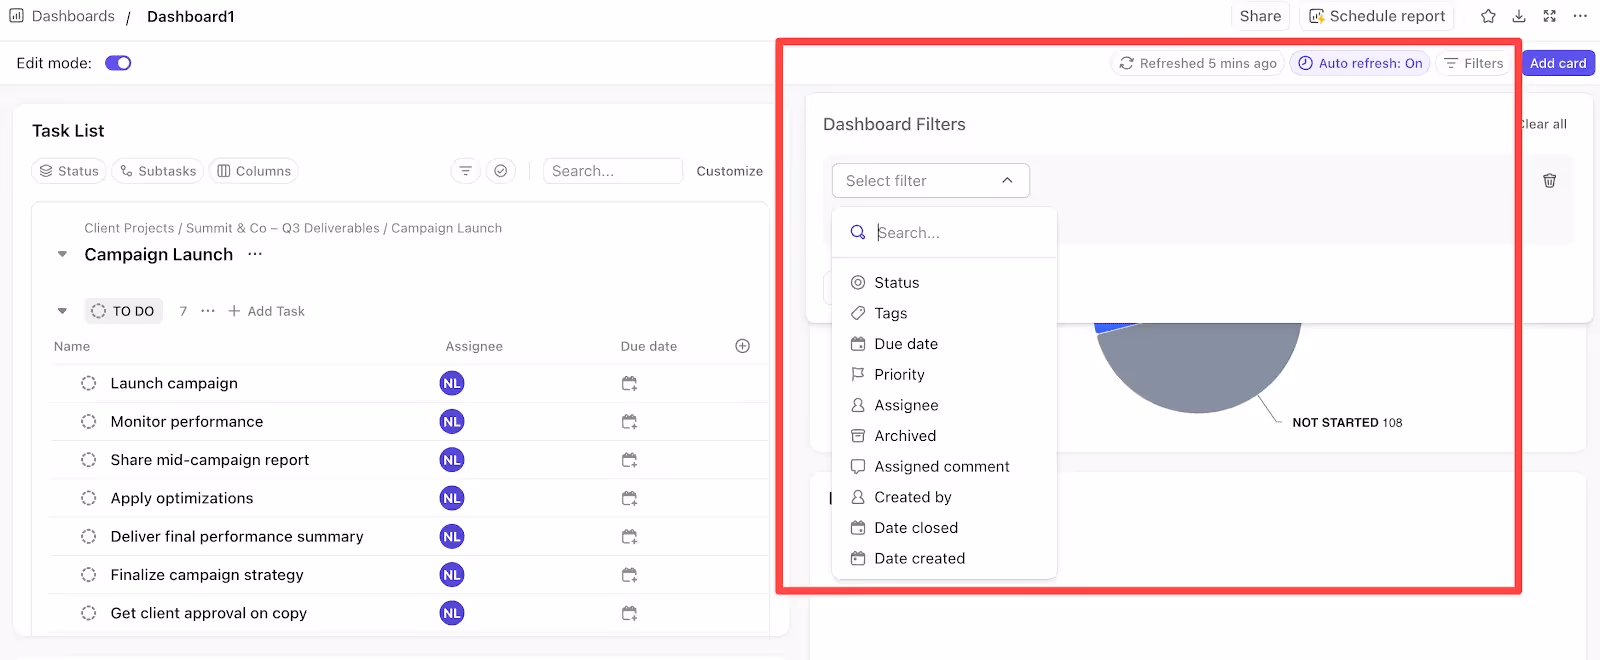
🔍 Note: Unlike sharing a Folder or List directly, Dashboards don’t expose the underlying workspace, so even if you forget to filter something, the client won’t see full task details.
Step 5: Share the Dashboard with your client
Click the “Share” button in the top-right corner of the Dashboard and invite them as a Guest (like in Option 1) for private access.
Option 3: How to Create a Client Portal Using a Public ClickUp Doc
If your client doesn’t need live charts or full project dashboards, a ClickUp Doc is the cleanest, no-fuss option. You can embed filtered task views, add a short welcome message, and share it with a public link—no login required.
Step 1: Create a new Doc
Start by creating a new ClickUp Doc in your workspace. You can either keep it in your personal Docs section or place it inside the client’s project folder if you want to keep things organized.
Give it a clear, friendly name. This name will show up in the shared link, so keep it professional and easy to recognize.
🔍 Note: If you want your team to collaborate on this Doc, make sure it's created in a shared space (not your personal workspace).
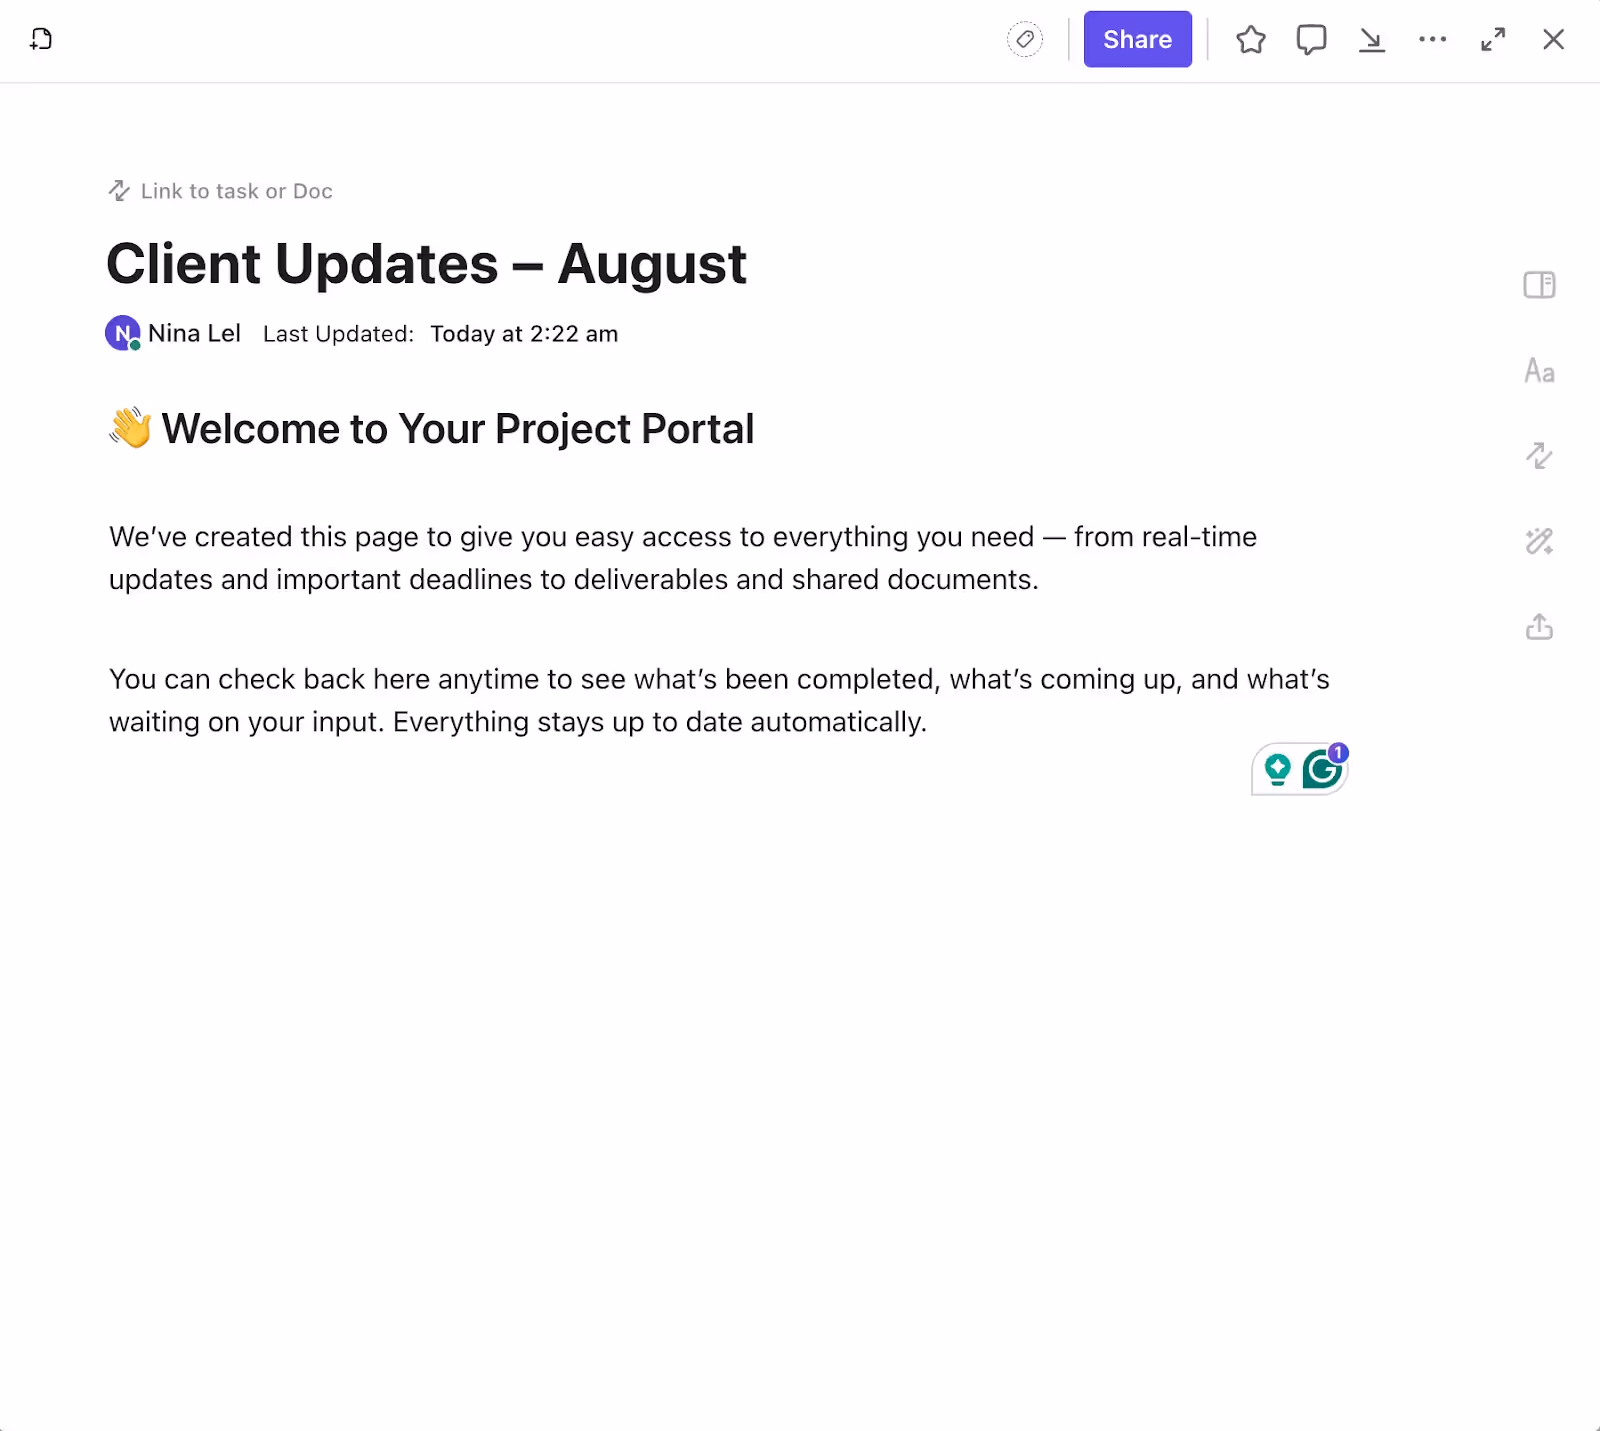
Step 2: Write a short welcome message
Use the top of the Doc to greet your client and let them know what they’ll find on the page. You don’t need much—even 2–3 sentences explaining that this page contains live updates and what to expect will make it feel thoughtful and professional.
Step 3: Embed task views (or anything else you need)
Now comes the helpful part: adding live ClickUp views into the Doc. These might include a filtered list of deliverables, a calendar, or even a visual timeline.
Just type / (dash) in the Doc and select what you'd like to insert.

🔍 Note: You can embed multiple views, like a list of “Waiting on Client” tasks, plus a timeline or status chart. Just be sure they’re filtered so clients only see what’s relevant.
Step 4: Share the Doc with a public link
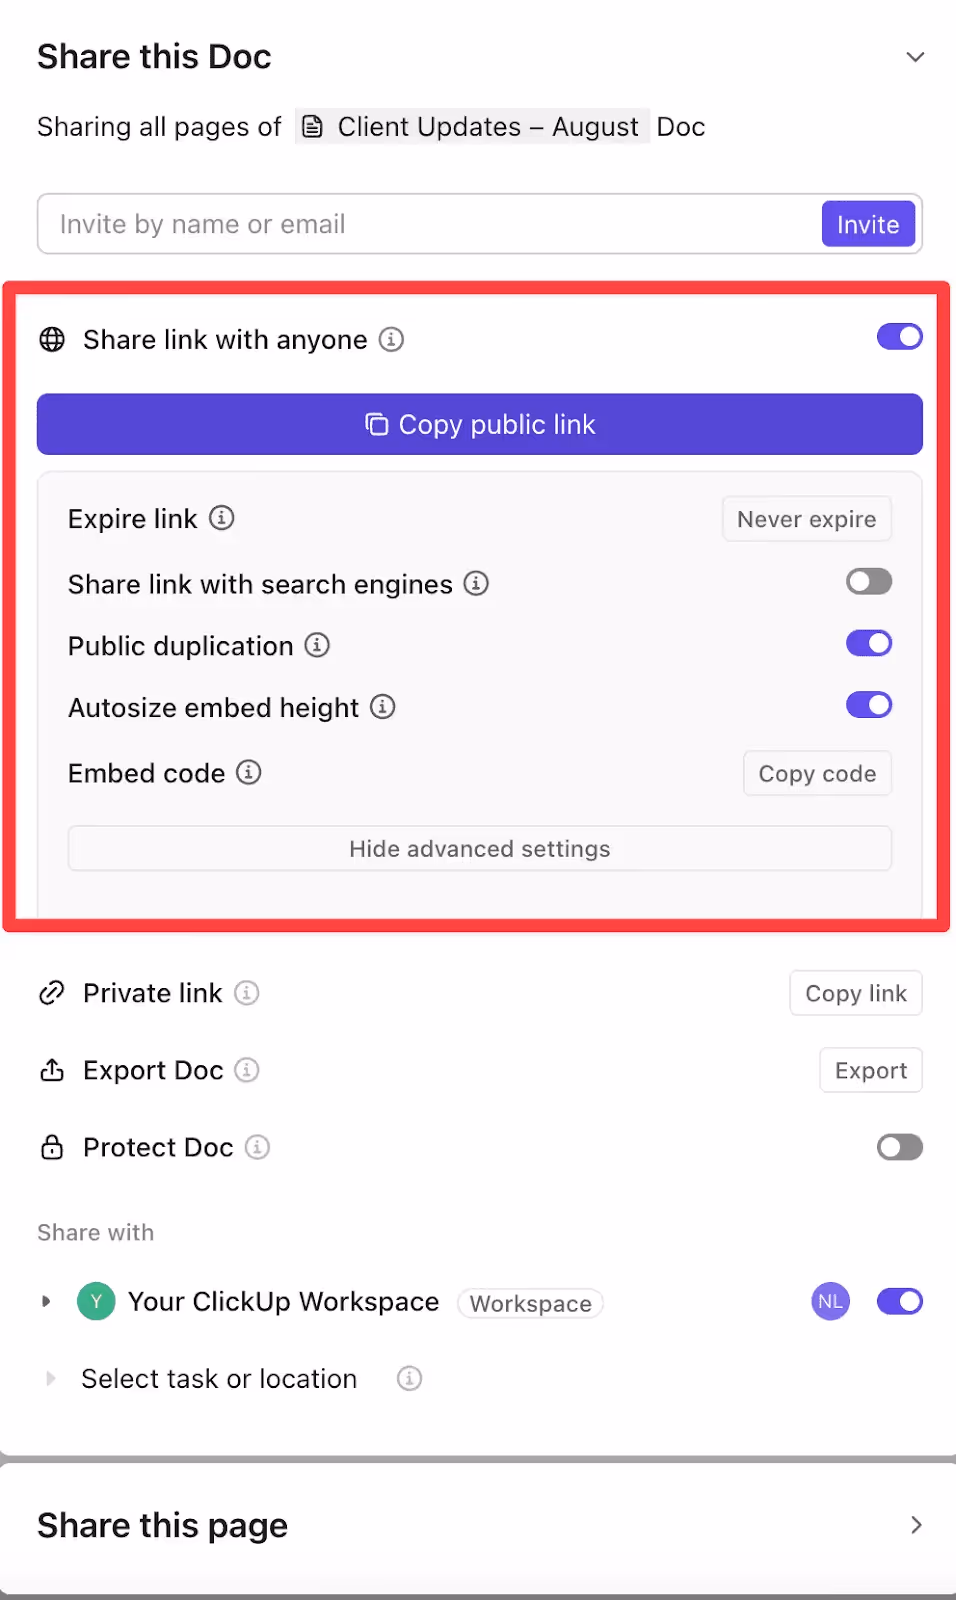
When you’re ready to share your portal, click the Share button in the top-right corner of the Doc.
- Toggle on “Share link with anyone”
- Then click “Copy public link” to grab the URL
No login or account needed for your client!
If the embedded views aren’t showing up for your client, double-check that those views are also set to public.
💡 Tip: Open the link in an incognito tab before sending it to your client to make sure everything looks right.
Is ClickUp the Best Place for Your Client Portal?
If you've made it this far, you've seen just how flexible ClickUp can be. With a little creativity, you can build a portal that keeps your clients updated through shared lists, dashboards, or public docs.
For many teams, that’s a great place to start.
But as your client work grows, you may start to notice the limitations:
- It’s built primarily for internal teams. ClickUp isn’t designed with clients in mind, so using it as a client portal requires extra effort like customizing views, adjusting permissions, and hiding internal work manually.
- It puts more work on your clients. While ClickUp offers a loginless public doc option, it’s limited to viewing. If clients need to interact with tasks or leave feedback, they’ll need to create an account and figure out how to use the platform.
- It lacks true white-labeling. While you can customize views and add your logo, ClickUp still carries its own branding. This makes it impossible to create a fully white-labeled experience that looks and feels like your business.
That’s why many teams eventually switch to a tool built specifically for client-facing work.
Looking for a Better Alternative to ClickUp?
Motion.io is client onboarding and engagement software that lets businesses automate the collection of files, forms, signatures, and other key information through client portals.
Here’s how it compares:
- While ClickUp requires complex permission setups, Motion.io gives you fully branded, loginless client portals that are simple to set up and share.
- Instead of asking clients to create an account or learn a new tool, Motion.io uses magic links. Your clients just click and go!
- And unlike ClickUp, where your branding options are limited, Motion.io gives you full white-label customization, so your portals look and feel like an extension of your brand.

Instead of customizing ClickUp for every client, Motion.io gives you everything you need to deliver a smooth, scalable experience from day one.


Scale your onboarding, not your overhead
Motion.io gives you the workflows, visibility, and automation to take on more clients--without the chaos.