
Jun 4, 2024
3 Ways to Send Invoices and Accept Payments in Motion.io
By
Sam Chlebowski
Instead of forcing clients to navigate different websites and apps, you can connect third-party payment software and have clients view invoices, enter payment details, and pay for your services directly in their Motion.io client portals.
This article will provide step-by-step instructions for three tools you can use to send invoices and accept payments in Motion.io.
3 Ways to Send Invoices and Accept Payments in Motion.io
In Motion.io, you can connect external software to both client tasks and portal pages. While this article will provide instructions for sending invoices and accepting payments through client tasks, the process for integrating the tools we'll cover into portal pages is similar.
Click here to learn more about embedding external software apps into Motion.io tasks.
Connect Square Payments to Motion.io
Square is payment processing software that allows businesses to accept payments easily, quickly, and seamlessly. You can connect Square to Motion.io by adding Square payment links to the "App embed" section of client tasks and portal pages.
Step 1
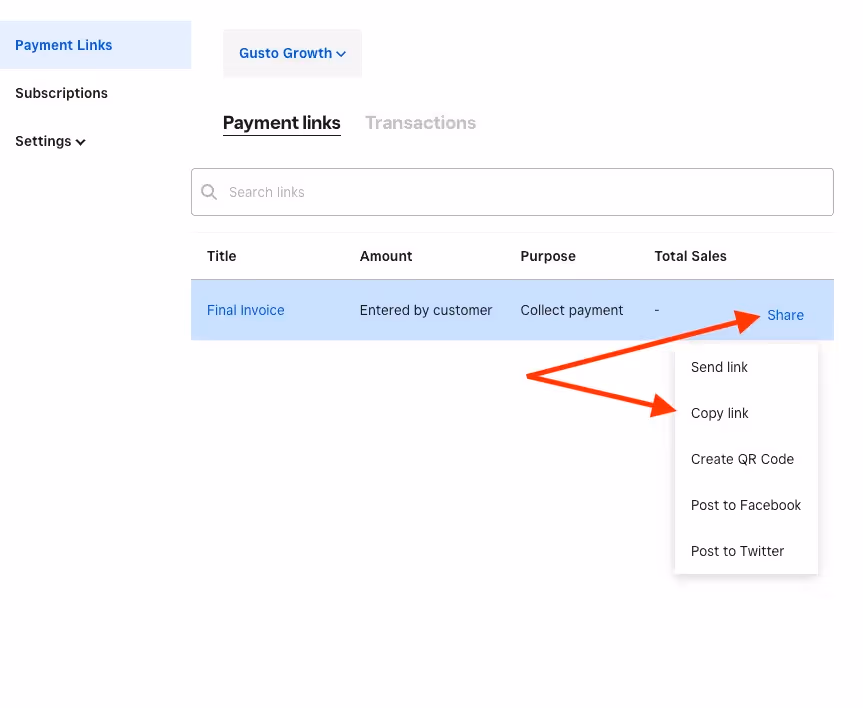
In your Square account, click "Payment Links" from the sidebar on the left. To the right of the payment link you'd like to connect to Motion.io, click "Share" and then "Copy Link."
Step 2
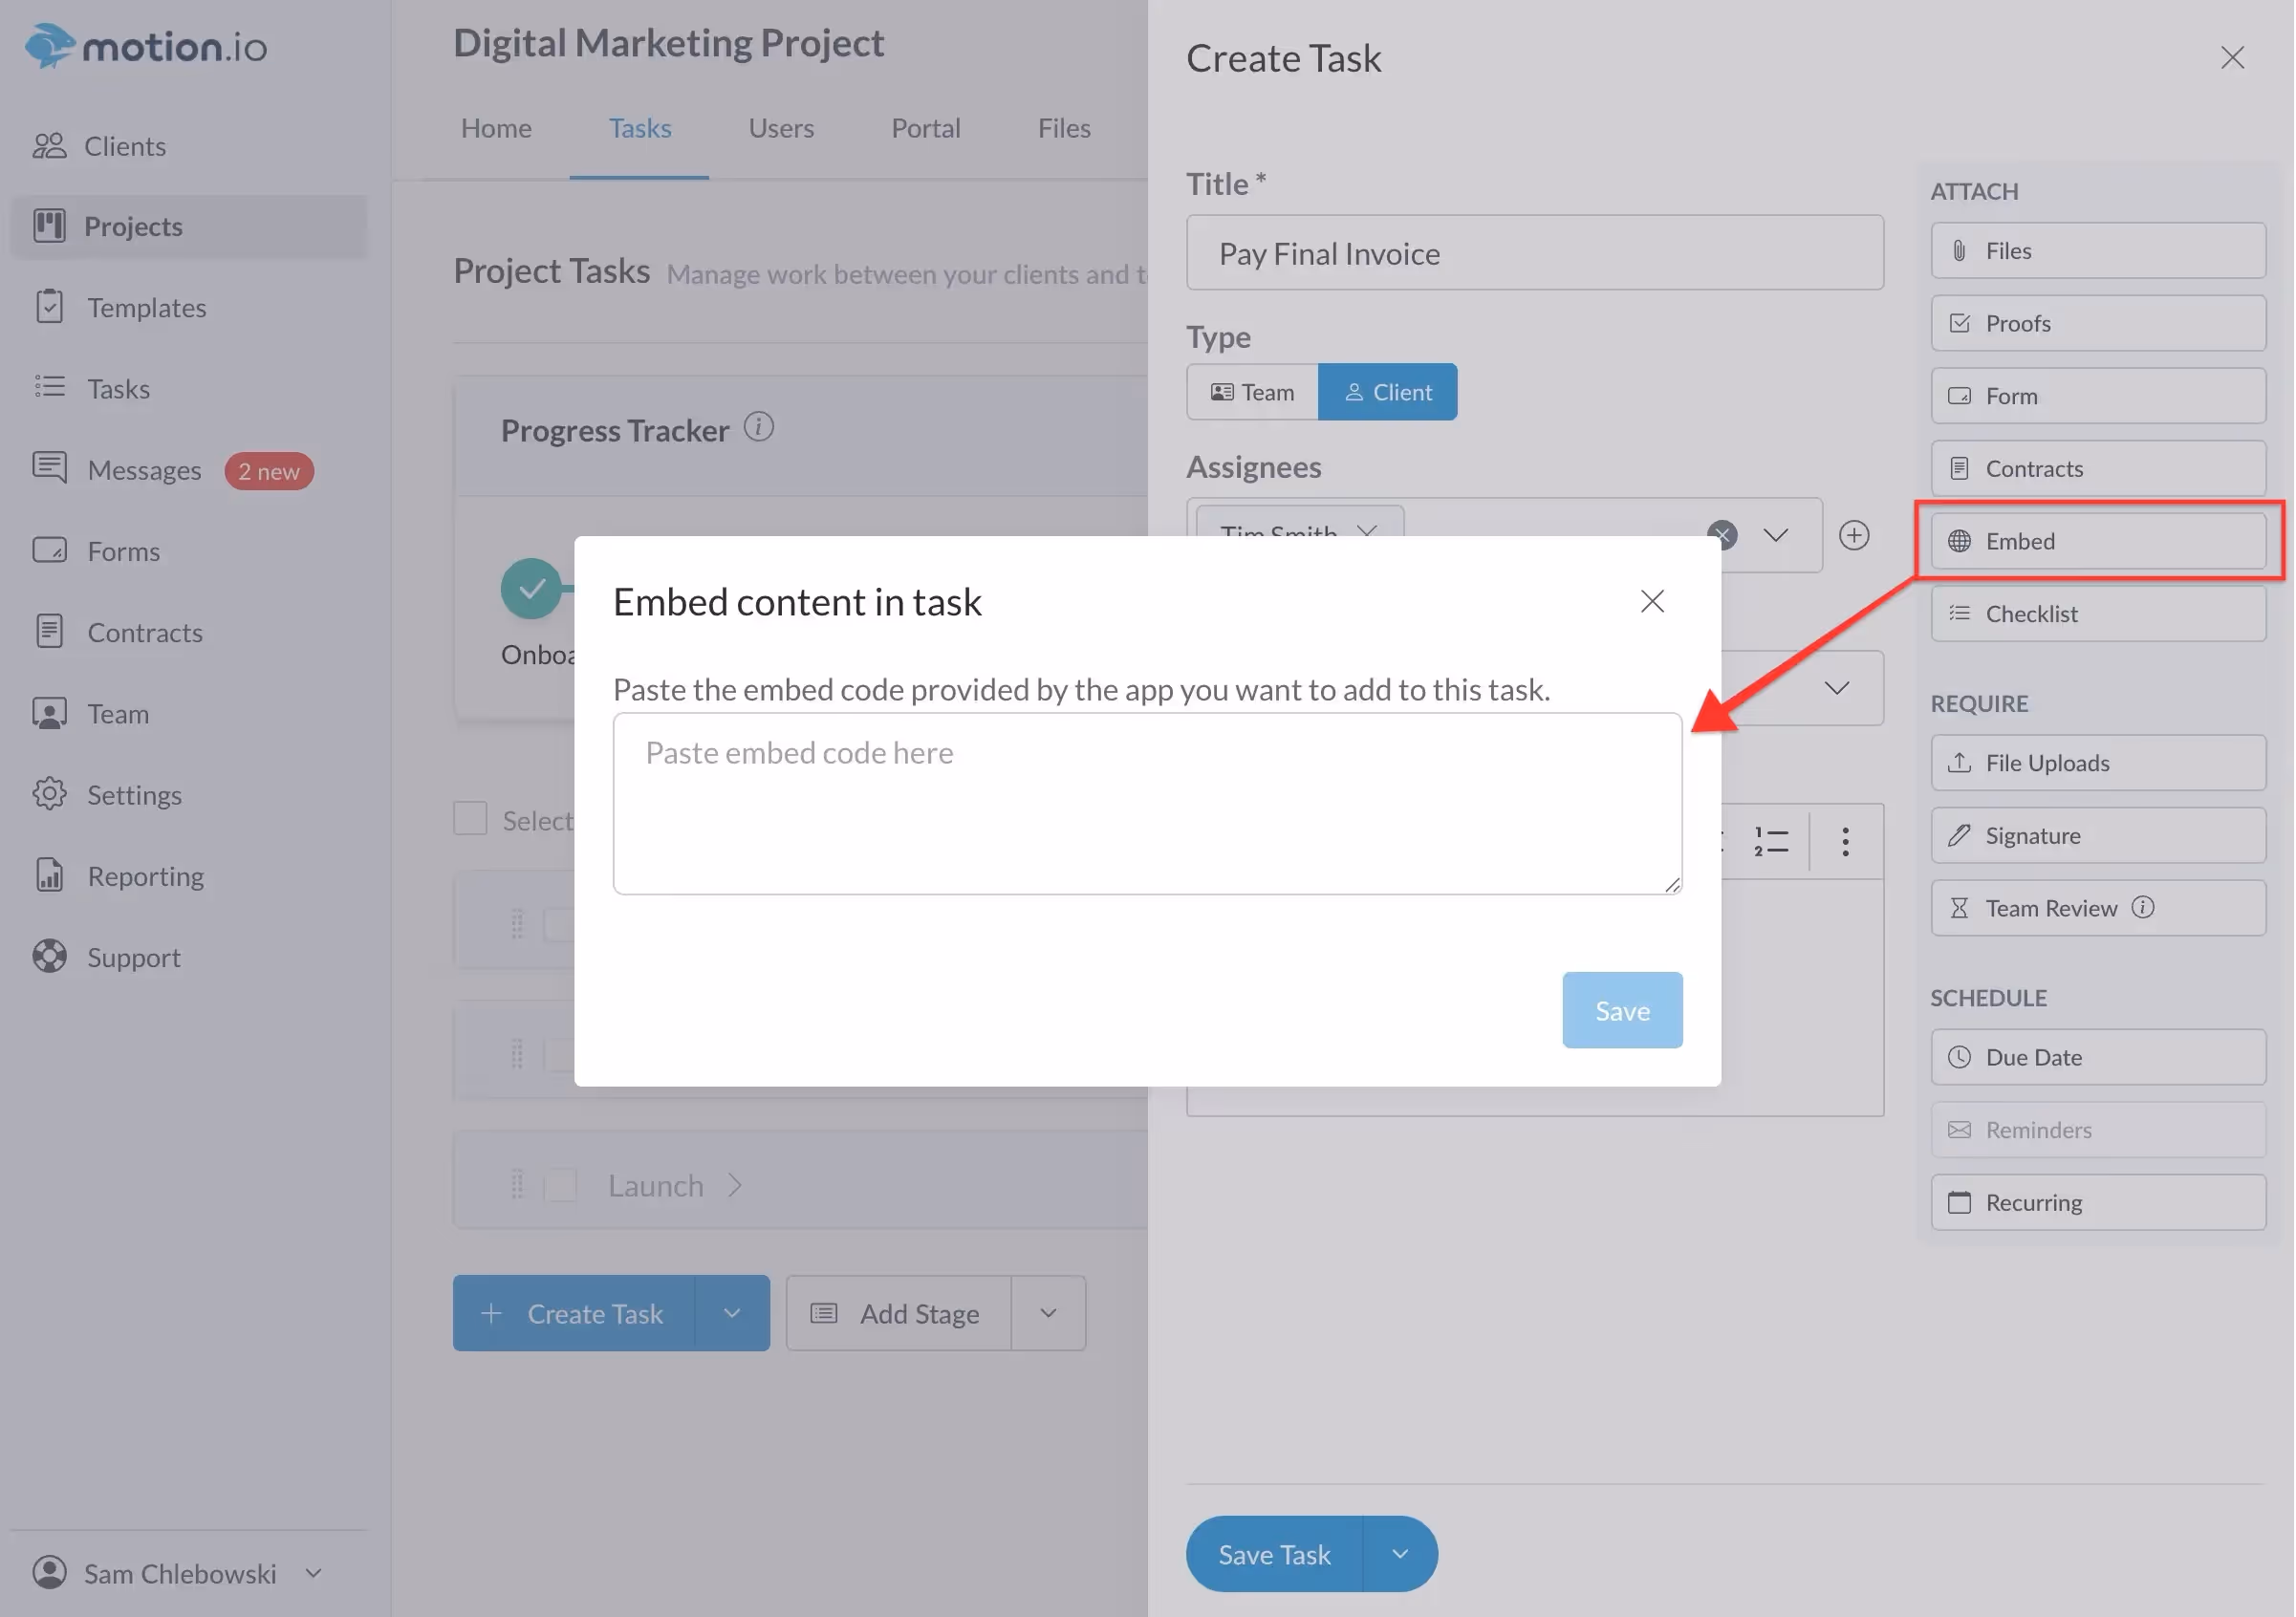
To add a Square payment link to a task in Motion.io, start by logging into your account and opening the project or template where you’d like the link to appear. On the Tasks page, either select an existing task or create a new one. In the task builder, choose the Embed option and paste in the payment URL you copied from Square. After that, fill in any additional task details, such as the title and description, and then click Save to finalize your changes.
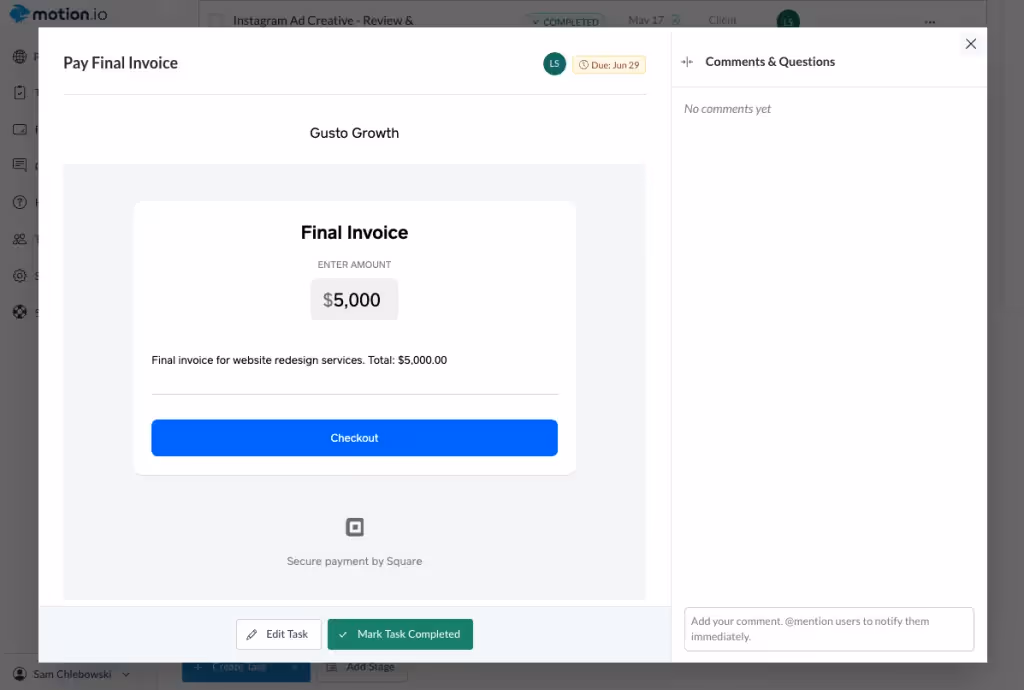
And you're done! If you'd like to preview how your embedded Square payment link will appear to the client in the task you added it to, click on the task's name to pull up an exact preview of what your client will see.
Connect Xero Invoices to Motion.io
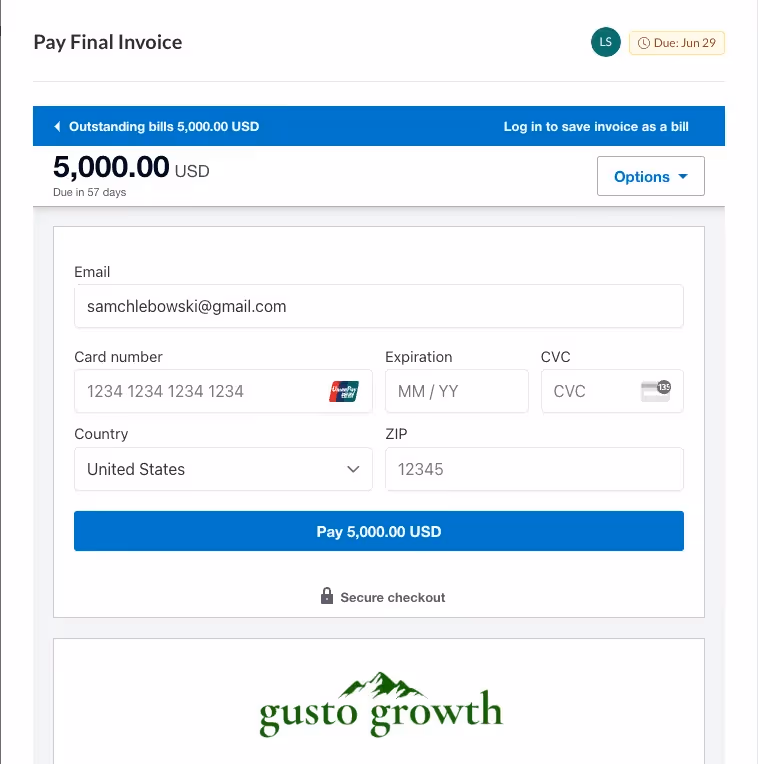
Xero is accounting software that allows small businesses to create invoices and payment links that connect directly to their bank account or third-party payment processors like Stripe and PayPal.
Here is how you can embed Xero invoices into tasks that clients can complete directly in their Motion.io portals:
Step 1
In your Xero account, open the invoice you'd like to embed in a Motion.io task or portal page and click "Get Link."
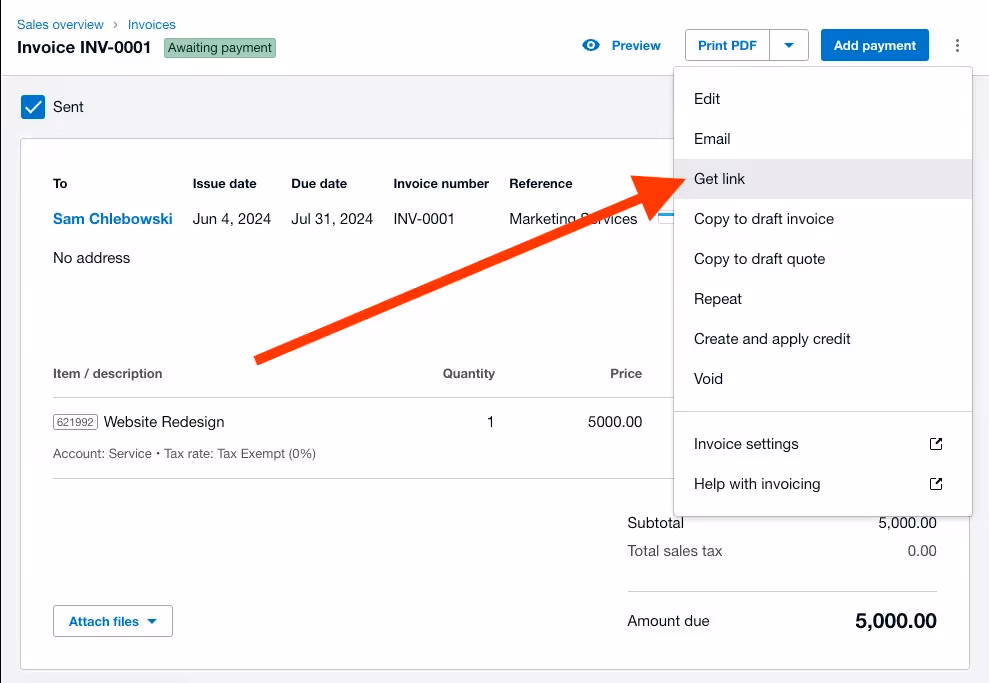
In the modal, click the "Copy" button.

Step 2
Head to your Motion.io account and open the project or template to which you want to add the Xero invoice link.
Select an existing task or click the button to create a new one. In the Motion.io task builder, toggle the "Embed" task option and paste the URL you copied from Xero into the modal.
After entering the additional details for the task (for example, a title/description), click "Save."
And you're done! If you'd like to preview how your embedded Xero invoice will appear to the client in the task you added it to, click on the task's name to pull up an exact preview of what your client will see.
Connect Stripe Subscriptions, Invoices, and Payments to Motion.io
While other payment processors (e.g., Xero, Square) can be embedded directly in Motion.io by pasting a link, Stripe blocks this ability. Because of this, native integration between Motion.io and Stripe is a high-priority feature on our roadmap (but it isn't available just yet).
Thankfully, there's a simple (and free) workaround:
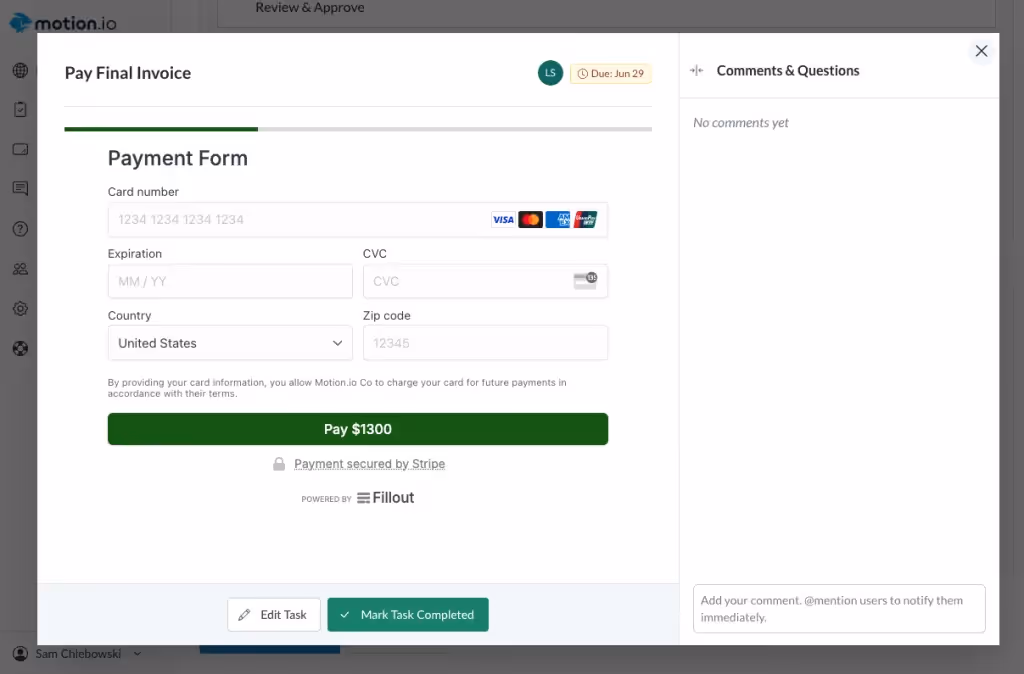
If you sign up for a free account with the form-builder tool Fillout, you can create forms that connect directly to your Stripe account. Once you've created the form or forms you want to use in Fillout, you can quickly connect them to Motion.io tasks and portal pages by pasting a link.
Step 1
After creating the Fillout form you'd like to embed, connecting it to your Stripe account, and publishing it, click "Share" at the top of your screen.

Step 2
Open the Motion.io project or template to where you'd like to embed the Fillout form. Select an existing task or click the button to create a new one. In the Motion.io task builder, click the "Embed" task option and paste the URL you copied from Fillout into the modal. Click save.
Click save again, and you're done! If you'd like to preview how your embedded Fillout form will appear to the client in the task you added it to, click on the task's name to bring up an exact preview of what your client will see.
Final Thoughts
If you don't yet have a Motion.io account, sign up for a trial and see why we are the best client portal & onboarding software out there. Please don't hesitate to let us know if you run into any issues while setting up these integrations; we're happy to help!


Scale your onboarding, not your overhead
Motion.io gives you the workflows, visibility, and automation to take on more clients--without the chaos.